Wednesday, February 1, 2012
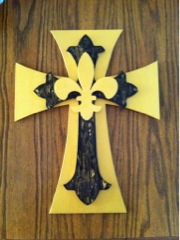
New Orleans Saints Cross
I ventured away from scrapbooking in this project. My daughter's boyfriend is a huge Saints fan. I had ordered these crosses back in September and just couldnt get motivated until his birthday came around. I was so afraid of messing it up but I think it turned out pretty good. He loved it! That made me feel good :).

Wednesday, January 18, 2012
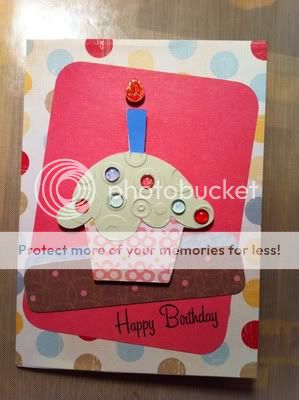
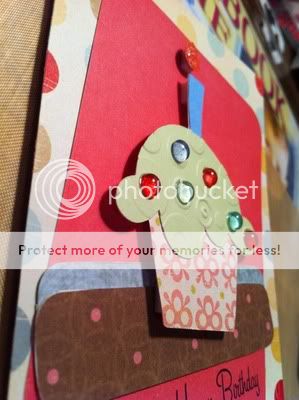
Birthday Card
Here is a Birthday card I made last night. I got the idea off another blog and revamped it. I had so much fun making it :-)
Recipe:
Doodlecharms for the Cupcake and cupcake border- Cupcake cut at 2.75" and the border cut at 1 1/2"
Poinsettas and baby blue dew drops
Cuttlebug embossing folder- forgot name -the one with various circles for cupcake iciing
Cuttlebug embossing folder- Dots for the cupcake border iciing
Orange stickles added to the flame
Mini Happy Birthday stamp purchased at Michaels dollar bin
Happy Birthday stamp that I purchased at Great American Scrapbook Convention (dont remember the brand)
Pop dots for the cupcake and flame
Orange paint pen for flames on the candles on the inside border
Various papers


Recipe:
Doodlecharms for the Cupcake and cupcake border- Cupcake cut at 2.75" and the border cut at 1 1/2"
Poinsettas and baby blue dew drops
Cuttlebug embossing folder- forgot name -the one with various circles for cupcake iciing
Cuttlebug embossing folder- Dots for the cupcake border iciing
Orange stickles added to the flame
Mini Happy Birthday stamp purchased at Michaels dollar bin
Happy Birthday stamp that I purchased at Great American Scrapbook Convention (dont remember the brand)
Pop dots for the cupcake and flame
Orange paint pen for flames on the candles on the inside border
Various papers

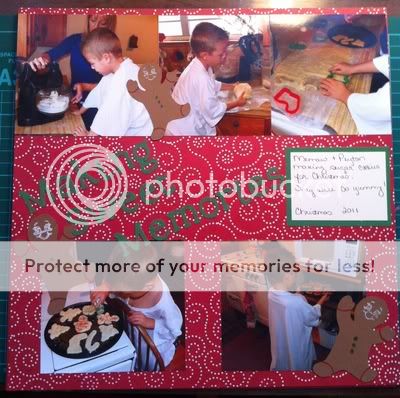
Making Sweet Memories
Here is a layout I did of me and my grandson making Christmas cookies. We had so much fun. I used JOTS for the the gingerbread man and I think Plantin Schoolbook for the title. Thanks for looking.

Saturday, January 14, 2012
Christmas Memories
This was the first year we had all our kids, grandkids, and most of my husbands family over for Christmas. It was also the first Christmas in our oldest son's house he has been building. It was great!
Recipe:
Christmas for "Christmas"
Home Decor for "Memories"

Recipe:
Christmas for "Christmas"
Home Decor for "Memories"
Friday, January 13, 2012
Thursday, January 12, 2012
My Heros have always been Cowboys
This is a double layout I did for my grandson's room. He had never rode a horse before. He was a natural! He said he wants to grow up to be a cowboy. Instead of calling my husband Papaw he calls him Cowboy James. It is so cute.
Recipe:
Paperdoll Dress Up for the Cowboys
Old West for the title and the horse
Various western stickers


Recipe:
Paperdoll Dress Up for the Cowboys
Old West for the title and the horse
Various western stickers


Monday, November 7, 2011
Count Peyton
Here is a layout I did of my grandson Count Peyton. I just love his costume and think his mother did an awesome job on his makeup. Title and date is from Alphalicious. The rest of the cuts are from Everyday Paper Dolls. I dry embossed the moon and added some ink to make it pop a little more. Added white and gold marker on all other cuts. I just love doing Halloween layouts. Thanks for looking :))


Too Cute to Spook
This is a layout I did of my grandson. He was a purple dino for his first Halloween. I thougtht the title fit him well. All cuts are from Everyday Paper Doll cartridge. The faces on the trick-or-treater's are Peachy Keen Stamps. Thanks for looking :))


Thursday, October 27, 2011
Christmas Cards 2011
I worked on my Christmas cards for 3 days and finally done with them. This is the first year that I got them done well in advance. I hate rushing more than anything.
Recipe:
Recollection ready made cards for the base.
Recollection Christmas stamp set.
Watercolor pencils (cant remember which brand)
Watercolor paper
Red ink
Green ink
Diamond stickles
Green cardstock
Red cardstock
Snowflake Cuttlebug embossing folder
First start by cutting mats to fit card base. Embossed mat with Cuttlebug Snowflake folder. Stamp Santa Clause onto watercolor paper. Color with watercolor pencils. I used Diamond Stickles on all white areas to give them substance. They looked awesome. The pictures really dont do them justice. They may have taken 3 days but are well worth it. Thanks for looking :-)


Recipe:
Recollection ready made cards for the base.
Recollection Christmas stamp set.
Watercolor pencils (cant remember which brand)
Watercolor paper
Red ink
Green ink
Diamond stickles
Green cardstock
Red cardstock
Snowflake Cuttlebug embossing folder
First start by cutting mats to fit card base. Embossed mat with Cuttlebug Snowflake folder. Stamp Santa Clause onto watercolor paper. Color with watercolor pencils. I used Diamond Stickles on all white areas to give them substance. They looked awesome. The pictures really dont do them justice. They may have taken 3 days but are well worth it. Thanks for looking :-)


Tuesday, October 25, 2011
Explosion Box
This weekend my Mom & Dad came in for a visit. I dont get to see them as much any more because they moved 8 hours away from me. I am not liking that !! Anyway when my mother & I get together we have to make at least one full day of crafting. We spent Monday making an Explosion Box, Earring holder, and Frame. We also had planned to start on our Christmas cards but didn't make it that far. LOL Anyway here is the Explosion Box I made....

This is the first layer (bottom). This layer was 12x12 paper scored at 4 inches all the way around. cutting out all four corners. I placed mats, then picture corners. Do not embellish the center as you will glue the second layer to it.

2nd layer
Here is the second layer. It is cut at 11x11. Scored at 3 3/4" all the way around cutting out the corners. Again place picture mats and corners to each one. Do not embellish the center as you will glue the final layer to it.

3rd layer
Here is the third layer. It is cut at 10x10 and scored at 3 1/2" all the way around cutting out the corners. Again place picture mats and corners to each one. This is the final layer so go ahead and decorate the center.

Finished w/lid
For the lid cut an 8x8 piece of paper and score at 2". I think next time I may score at 1 1/2" as the lid fit very tightly and hard to get on. Decorate the outside. Adhere 12 photos to the layers. Fold all layers up to form the sides of the box and place lid on.

There you are. All finished. I loved this project. It was very easy and fun to make and will make a wonderful gift. My grandmother is always wanting pictures so I developed 13 pics to add. I thought this would make a great gift for her. Thanks for checking it out. :-)
Wednesday, October 12, 2011
Dad's Birthday Card
Here is a Birthday card I made my dad. They are coming in this weekend. I am so excited! His birthday is the first week of November but I never get to spend it with him. They usually come up in September or October. We usually go down for a visit either at Thanksgiving or Christmas. So I decided I was going to have him a surprise birthday party. He is a cowboy at heart so I thought he would love this stamp set. It is from Stampin' Up.


Subscribe to:
Posts (Atom)